<script type="text/javascript" src="http://cdn.mathjax.org/mathjax/latest/MathJax.js?config=TeX-AMS-MML_HTMLorMML"></script>
扁平化卷曲页图像,作为一个优化问题。
前阵子,我写了一个脚本来根据手写文本图片创建PDF。这没啥特别的 —— 只是自适应阈值,然后将多个图像合并成一个PDF —— 但每当有学生给我发了一堆JPEG作为他们的作业的时候,这就派上了用场。在我向我的未婚妻演示了这个程序后,她最后让我偶尔在她用于语言学研究的归档文档上运行它。这个夏天,她从图书馆带回来了大量的图片,其中,由于卷曲页,文本明显的扭曲。
因此,我决定写个程序_自动地_将诸如下面左边的图片转换成右边的图片:
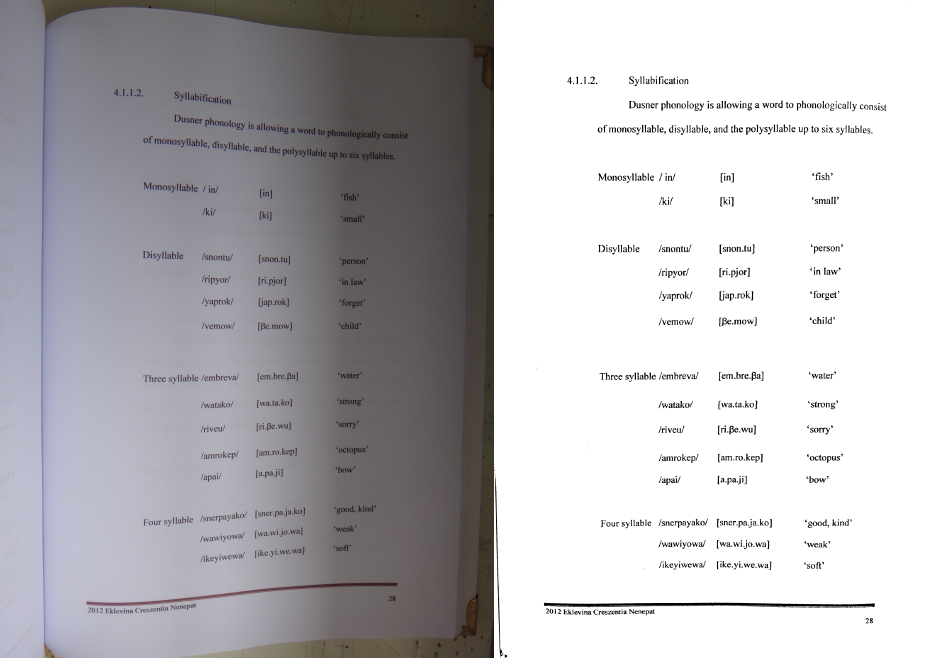
正如这个博客中的每个项目,代码在github上。如果你想要先看看更多之前之后的图片,那么随你跳到结果部分。
我绝对不是第一个想出文档图像扭曲矫正办法的人 —— 甚至在Dan Bloomberg的开源图像处理库Leptonica中就有对其实现 —— 但当涉及到了解一个问题时,没有什么比自己实现更好的了。除了通过浏览Leptonica代码,我还扫了关于这个主题的几篇论文,包括一个扭曲矫正比赛结果的综述,以及关于竞赛获奖的坐标转换模型(CTM)方法的文章。
Leptonica的扭曲矫正方法和CTM方法都有相似的分级问题分解:
-
拆分文本至行。
-
查找扭曲或者坐标转换,从而使行平行或水平。
对我来说,较之CTM的3D “cylinder”模型,Leptonica对于第二个子问题的解决方法似乎有点特别。老实说,在破译CTM论文的过程中,我遇到了点麻烦,但我喜欢基于模型的方法这个想法。因此,我决定创造自己的参数模型,其中,页面的外观由多个参数确定:
-
一个旋转向量$r$,以及一个平移向量$t$,它们都在${\Bbb {R}}^3$中,其参数化页面的3D取向和位置。
-
两个斜率
$\alpha$ 和$\beta$,指定页面表面的曲率(参见下面的曲线图) -
页面上$n$水平跨度的垂直偏移$y_1,...,y_n$
-
对于每个跨度$i\in{1,...,n}$,$m_i$的水平偏移$x_i^{(1)},...,x_i^{(m_i)}$指向水平跨度(所有都位于垂直偏移$y_i$)
该页面的3D形状来源于沿着局部$y$轴横扫曲线(从顶至底方向)。页面上的每个$x$ (从左到右)坐标映射到页面表面的位移$z$。我将页面表面的水平截面建模成一个三次样条,其端点固定在零点。样条曲线的形状可以完全由其在端点$\alpha$和$\beta$的斜率指定。
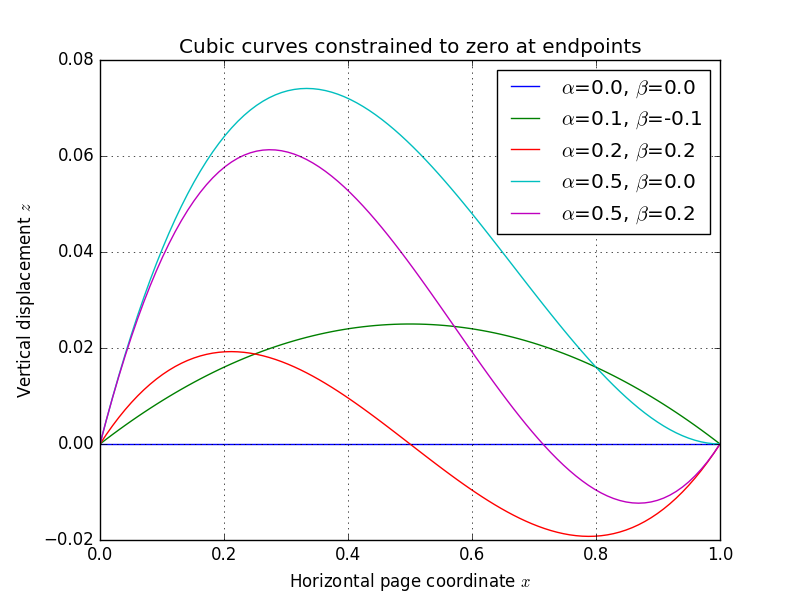
如图所示,修改斜率参数,获得各种各样的“类页”曲线。下面,我已经生成了一个动画,它修复了页面尺寸和和所有的$(x,y)$坐标,同时改变位姿/形状参数$r$,$t$,$\alpha$和$\beta$ —— 你可以开始欣赏参数空间跨越有用的各种页面外观:

重要的是,一定位姿/形状参数固定了,页面上的每个$(x,y)$坐标会被投影到图像平面上一个确定的位置。有了这个丰富的模型,现在,我们可以将整个扭曲矫正拼图框架为一个优化问题:
-
identify a number of keypoints along horizontal text spans in the original photograph
-
starting from a naïve initial guess, find the parameters , , , , , , , , , which minimize the reprojection error of the keypoints
Here is an illustration of reprojection before and after optimization:
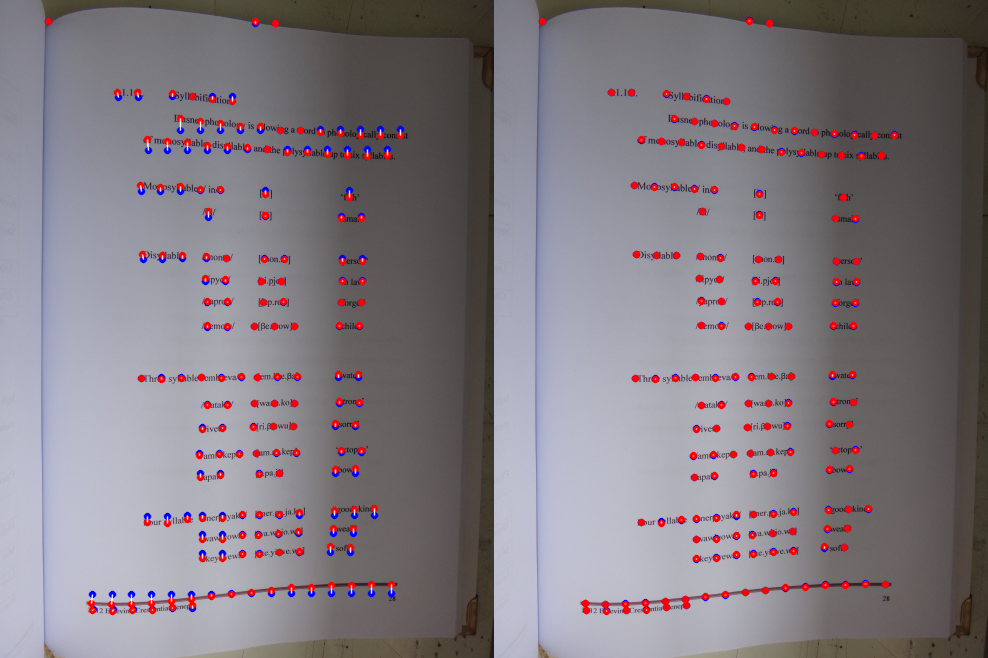
The red points in both image are detected keypoints on text spans, and the blue ones are reprojections through the model. Note that the left image (initial guess) assumes no curvature at all, so all blue points are collinear; whereas the right image (final optimization output) has established the page pose/shape well enough to place almost all of the blue points on top of each corresponding red point.
Once we have a good model, we can isolate the pose/shape parameters, and invert the resulting page-to-image mapping to dewarp the entire image. Of course, the devil is in the details.
<<<<<<< HEAD
=======
415706004c54800bb7338543c0b4b30b328dc2b2
Here is a rough description of the steps I took.
-
Obtain page boundaries. It’s a good idea not to consider the entire image, as borders beyond the page can contain lots of garbage. Instead of intelligently identifying page borders, I opted for a simpler approach, just carving out the middle hunk of the image with fixed margins on the edges.
-
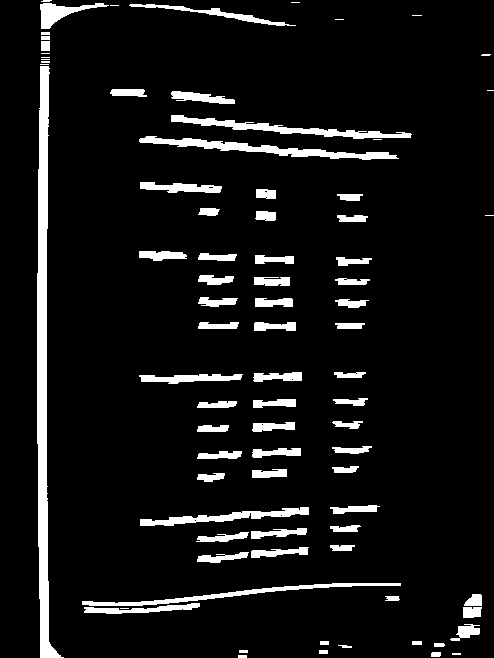
Detect text contours. Next, I look for regions that look “text-like”. This is a multi-step process that involves an initial adaptive threshold:
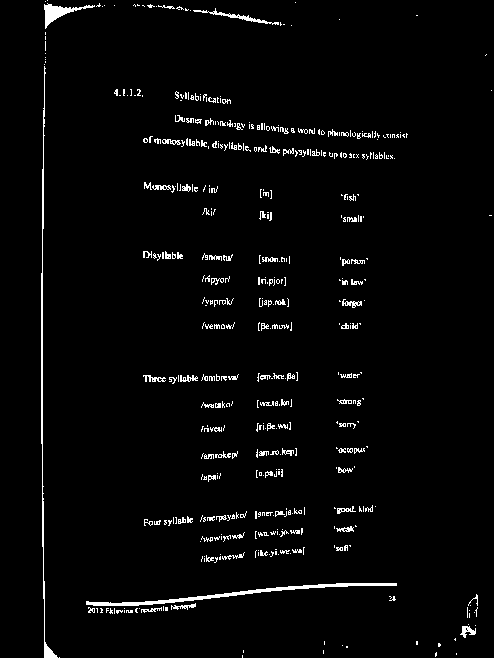
…morphological dilation by a horizontal box to connect up horizontally adjacent mask pixels:
…erosion by a vertical box to eliminate single-pixel-high “blips”:
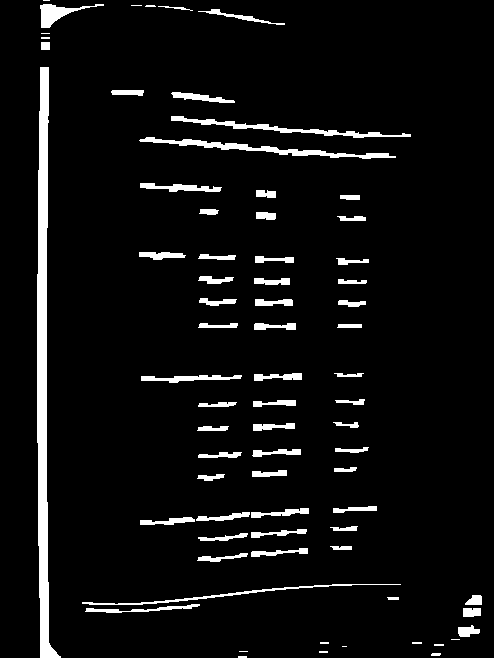
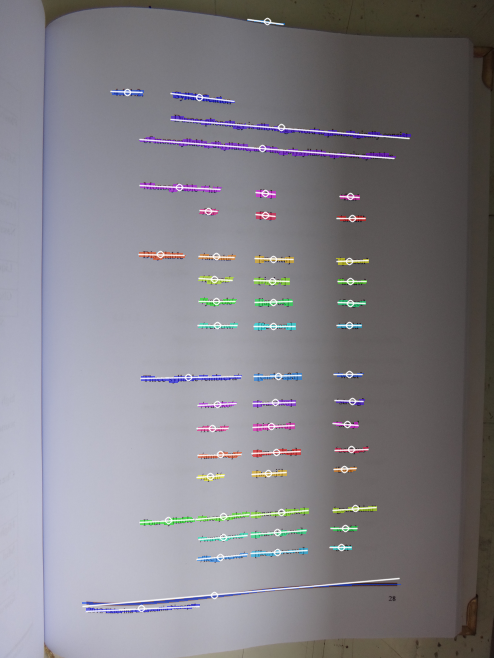
and finally, connected component analysis with a filtering step to eliminate any blobs which are too tall (compared to their width) or too thick to be text. Each remaining text contour is then approximated by its best-fitting line segment using PCA, as shown here:
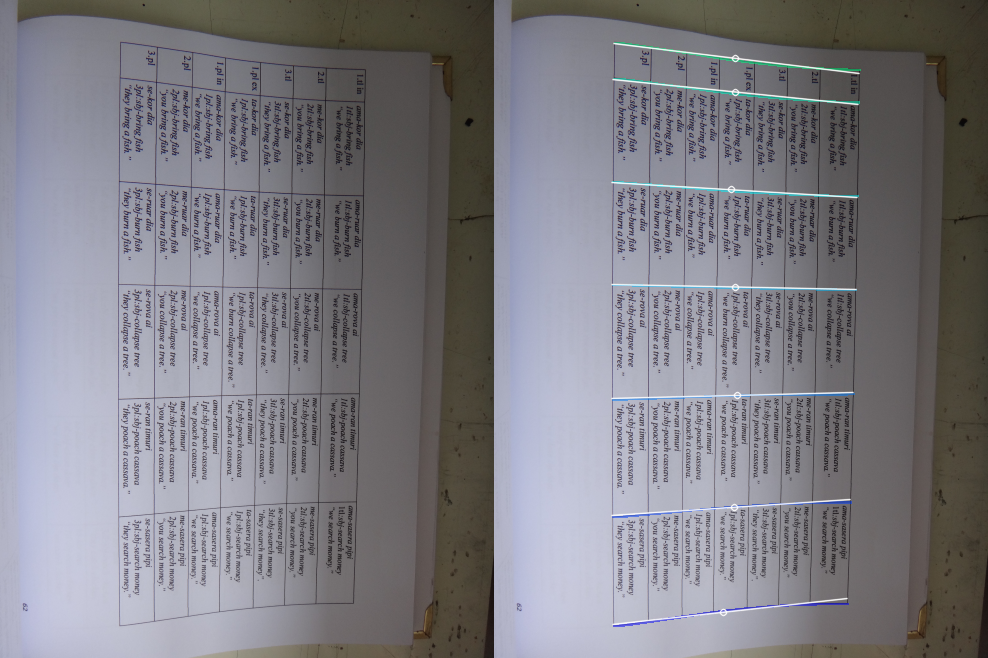
Since some of the images that my fiancée supplied were of tables full of vertical text, I also specialized my program to attempt to detect horizontal lines or rules if not enough horizontal text is found. Here’s an example image and detected contours:
- Assemble text into spans. Once the text contours have been identified, we need to combine all of the contours corresponding to a single horizontal span on the page. There is probably a linear-time method for accomplishing this, but I settled on a greedy quadratic method here (runtime doesn’t matter much here since nearly 100% of program time is spent in optimization anyways).
Here is pseudocode illustrating the overall approach:
edges = []

for each contour a:
  for each other contour b:
     cost = get_edge_cost(a, b)
     if cost < INFINITY:
        edges.append( (cost, a, b) )

sort edges by cost

for each edge (cost, a, b) in edges:
  if a and b are both unconnected:
    connect a and b with edge e
Basically, we generate candidate edges for every pair of text contours, and score them. The resulting cost is infinite if the two contours overlap significantly along their lengths, if they are too far apart, or if they diverge too much in angle. Otherwise, the score is a linear combination of distance and change in angle.
Once the connections are made, the contours can be easily grouped into spans; I also filter these to eliminate any that are too small to be useful in determining the page model.
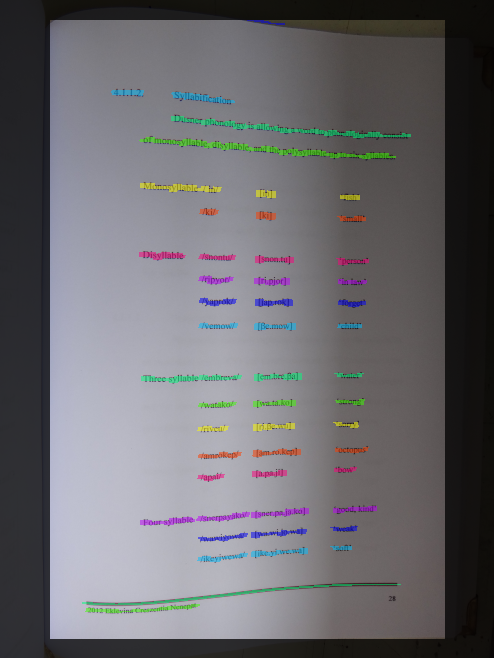
Above, you can see the span grouping has done a good job amalgamating the text contours because each line of text has its own color.
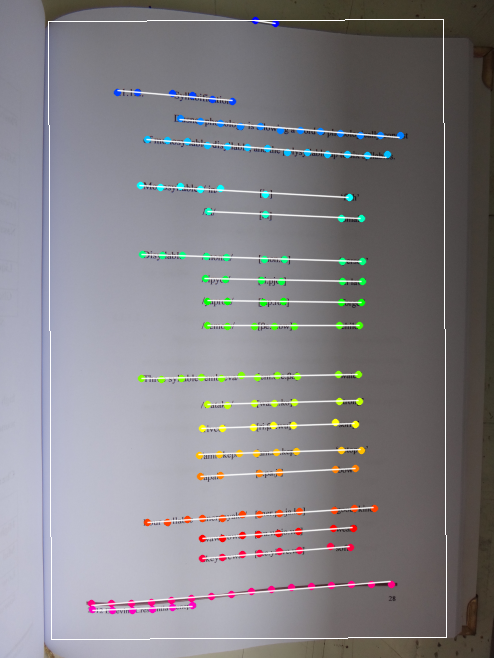
- Sample spans. Because the parametric model needs discrete keypoints, we need to generate a small number of representative points on each span. I do this by choosing one keypoint per 20 or so pixels of text contour:
-
Create naïve parameter estimate. I use PCA to estimate the mean orientation of all spans; the resulting principal components are used to analytically establish the initial guess of the and coordinates, along with the pose of a flat, curvature-free page using
cv2.solvePnP. The reprojection of the keypoints will be accomplished by sampling the cubic spline to obtain the -offsets of the object points and callingcv2.projectPoints. to project into the image plane. -
Optimize! To minimize the reprojection error, I use
scipy.optimize.minimizewith the'Powell'solver as a black-box, derivative-free optimizer. Here’s reprojection again, before and after optimization:
Nearly 100% of the program runtime is spent doing this optimization. I haven’t really experimented much with other solvers, or with using a specialized solver for [nonlinear least squares](https://en.wikipedia.org/wiki/Non- linear_least_squares) problems (which is exactly what this is, by the way). It might be possible to speed up the optimization a lot!
- Remap image and threshold. Once the optimization completes, I isolate the pose/shape parameters , , , and to establish a coordinate transformation. The actual dewarp is obtained by projecting a dense mesh of 3D page points via
cv2.projectPointsand supplying the resulting image coordinates tocv2.remap. I get the final output withcv2.adaptiveThresholdand save it as a bi-level PNG using Pillow. Again, before and after shots:
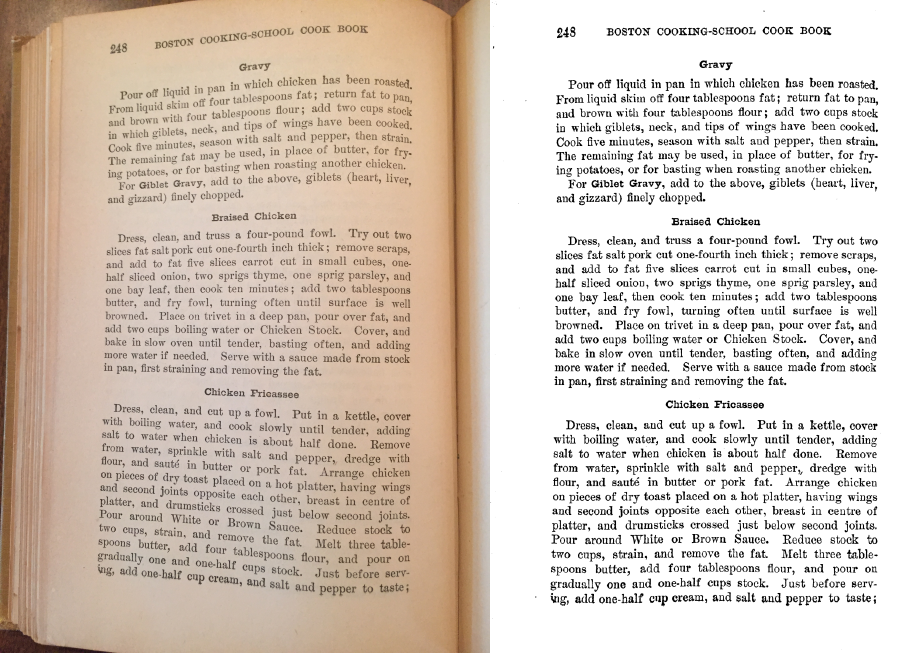
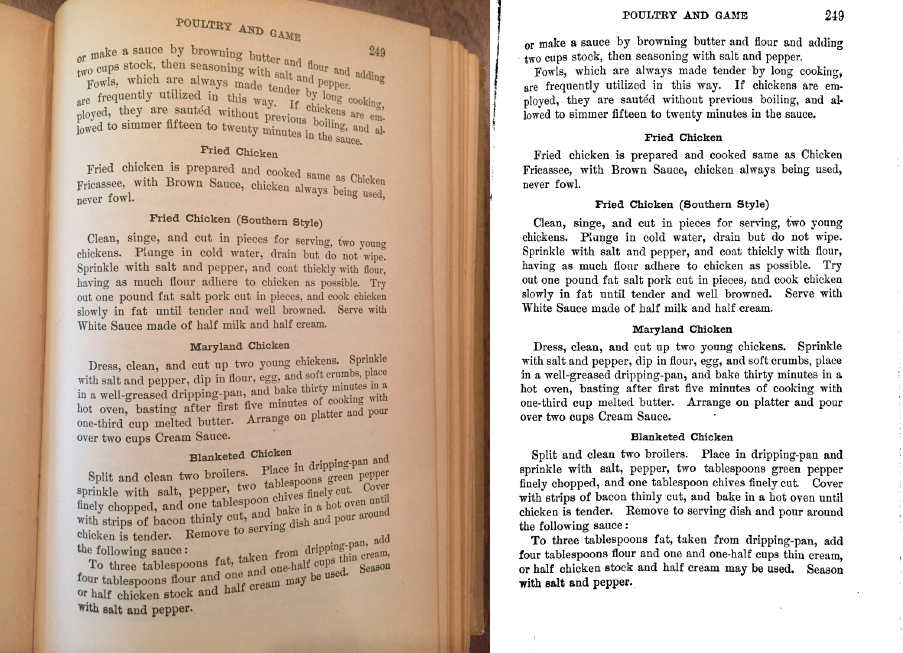
I’ve included several example images in the github repository to illustrate how the program works on a variety of inputs. Here are the images, along with the program output:
boston_cooking_a.jpg:
boston_cooking_b.jpg:
linguistics_thesis_a.jpg:
linguistics_thesis_b.jpg:
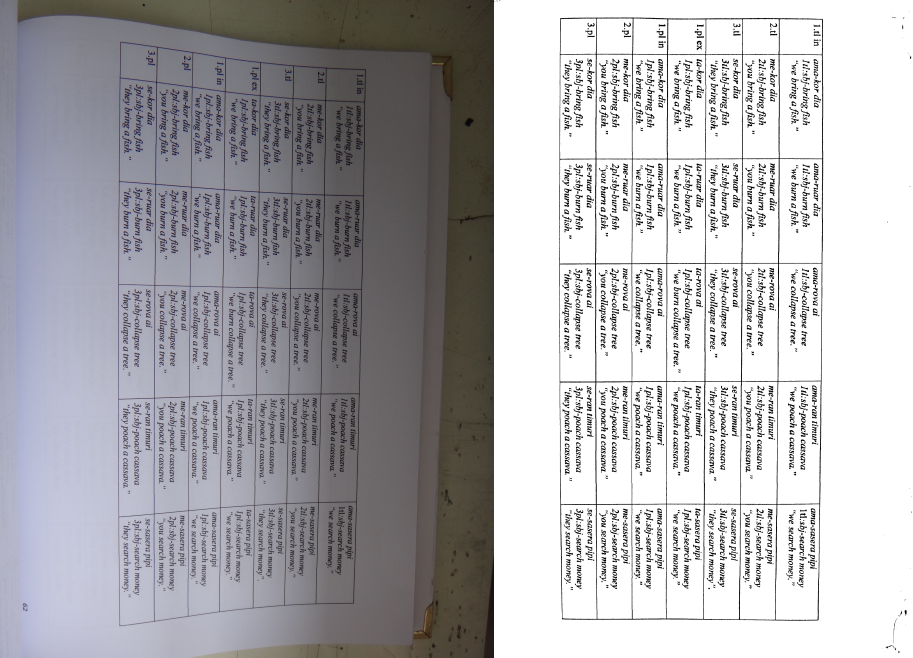
I also compiled some statistics about each program run (take the runtimes with a grain of salt, this is for a single run on my 2012 MacBook Pro):
| Input | Spans | Keypoints | Parameters | Opt. time (s) | Total time (s) |
|---|---|---|---|---|---|
| boston_cooking_a.jpg | 38 | 554 | 600 | 23.3 | 24.8 |
| boston_cooking_b.jpg | 38 | 475 | 521 | 18.0 | 18.8 |
| linguistics_thesis_a.jpg | 20 | 161 | 189 | 5.1 | 6.1 |
| linguistics_thesis_b.jpg | 7 | 89 | 104 | 4.2 | 5.3 |
You can see these are not exactly small optimization problems. The smallest one has 89 parameters in the model, and the largest has 600. Still, I’m sure the optimization speed could be improved by trying out different methods and/or using a compiled language.
The way this project unfolded represents a fairly typical workflow for me these days: do a bit of reading to collect background knowledge, and then figure out how to formulate the entire problem as the output of some optimization process. I find it’s a pretty effective way of tackling a large number of technical problems. Although I didn’t think of it at the time, the overall approach I took here is reminiscent of both deformable part models and active appearance models, though not as sophisticated as either.
Both Leptonica and the CTM method go one step further than I did, and try to model/repair horizontal distortion as well as vertical. That would be useful for my code, too – because the cubic spline is not an arc-length parameterization, the text is slightly compressed in areas where the cubic spline has a large slope. Since this project was mostly intended as a proof-of-concept, I decided not to pursue the issue further.
Before putting up the final code on github, I tried out using the automated
Python style checker Pylint for the first time. For
some reason, on its first run it informed me that all of the cv2 module
members were undefined, leading to an initial rating of -6.88/10 (yes,
negative). Putting the line
# pylint: disable=E1101
near the top of the file made it shut up about that. After tweaking the program for a while to make Pylint happier, I got the score up to 9.09/10, which seems good enough for now. I’m not sure I agree 100% with all of its default settings, but it was interesting to try it out and learn a new tool.
I do all of my coding these days in GNU Emacs, which usually suits my needs;
however, messing around with Pylint led me to discover a feature I had never
used. Pylint is not fond of short variable names like h (but has no problem
with i, go figure). If I use the normal Emacs query-replace function bound
to M-% and try to replace h with height everywhere, I have to pay close
attention to make sure that it doesn’t also try to replace the h other
identifiers (like shape) as well. A while back, I discovered I could
sidestep this by using query-replace-regexp instead, and entering the
regular expression \bh\b as the replacement text (the \b stands for a word
_b_oundary, so it will only match the entire “word” h). On the other hand,
it’s a bit more work, and I thought there must be a better place to do “whole-
word” replacement. A bunch of Googling led me to this Stack Exchange answer, which says that using
the universal-argument command C-u in Emacs before a query-replace
will do exactly what I want. I never knew about universal-argument before –
always good to learn new tricks!
At this point, I don’t anticipate doing much more with the dewarping code. It could definitely use a thorough round of commenting, but the basics are pretty much spelled out in this document, so I’ll just slap a link here on the github repo and call it a day. Who knows – maybe I’ll refer back to this project again the next time I teach computer vision…